01What the integration does
The Shopify integration connects your store directly to your accounting in einzly. As soon as an order is paid, the rest happens automatically:
- Every paid order is automatically booked as income (gross amount)
- Shopify transaction fees are automatically recorded as an expense (category: bank charges)
- Refunds are recorded as negative income — VAT-correct (more on this below)
- Foreign currencies are detected and assigned correctly (CHF or abroad)
- The receipt is linked automatically — the order in the Shopify admin serves as proof
- Duplicate detection — the same order is never booked twice
- Daily automatic synchronisation, plus a manual sync at the push of a button
02How to connect Shopify to einzly
In early 2026 Shopify changed how external tools connect. You create your own app once in the Shopify Dev Dashboard and copy two credentials — Client ID and Client Secret — into einzly. It sounds technical, but it only takes a few minutes. Here it is step by step.
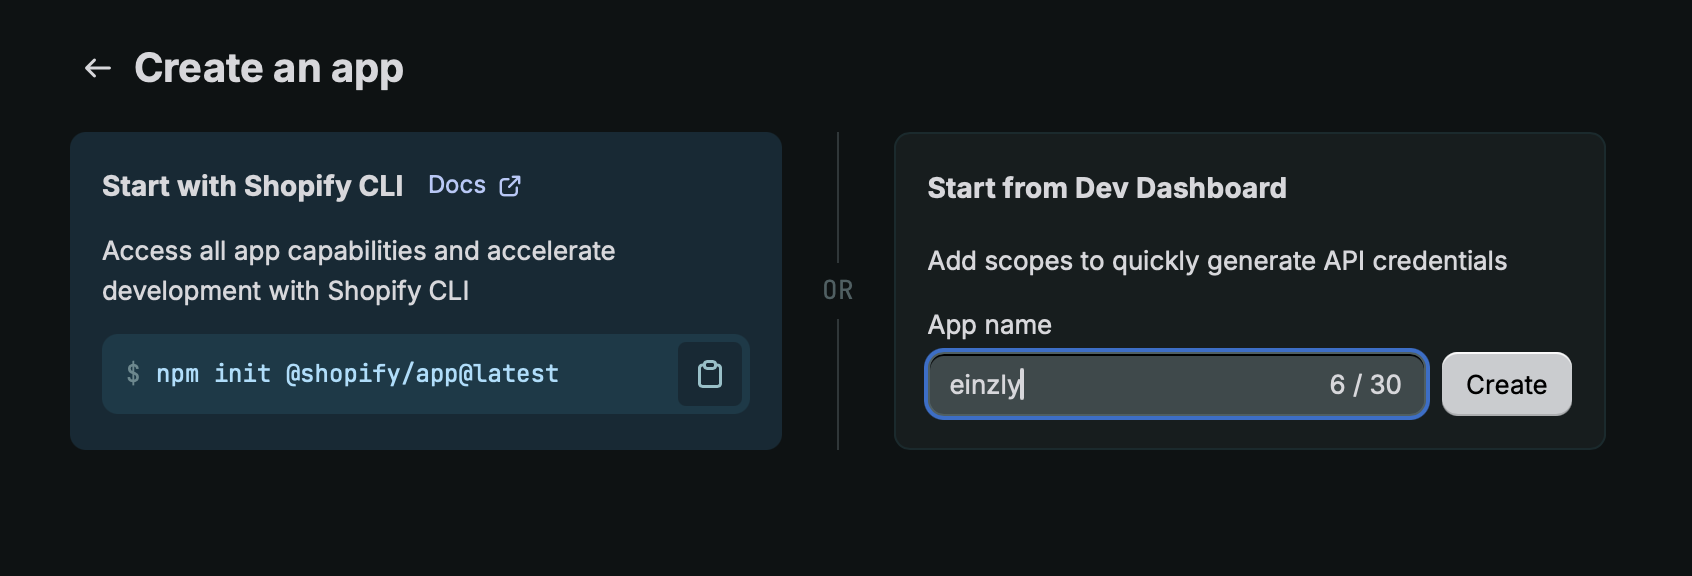
Step 1: Create an app in the Dev Dashboard
Open dev.shopify.com and sign in with your Shopify account. Under «Create an app», choose «Start from Dev Dashboard» on the right, enter a name (for example einzly) and click «Create».
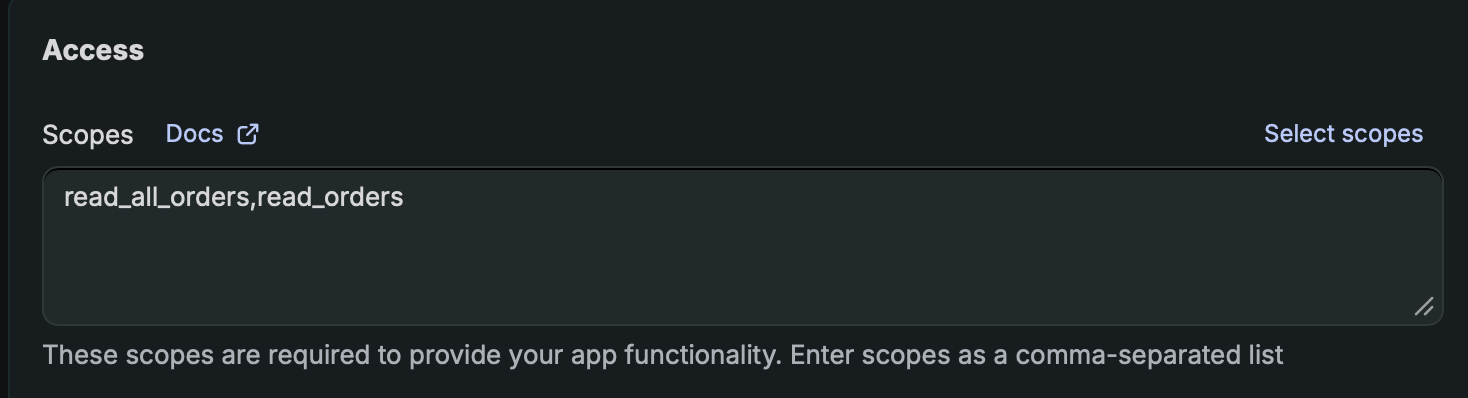
Step 2: Set the permissions (scopes)
In the app configuration you'll find the «Access» → «Scopes» section. Enter read_orders and read_all_orders (comma-separated). That's all einzly needs — read-only access to your orders. einzly changes nothing in your store.
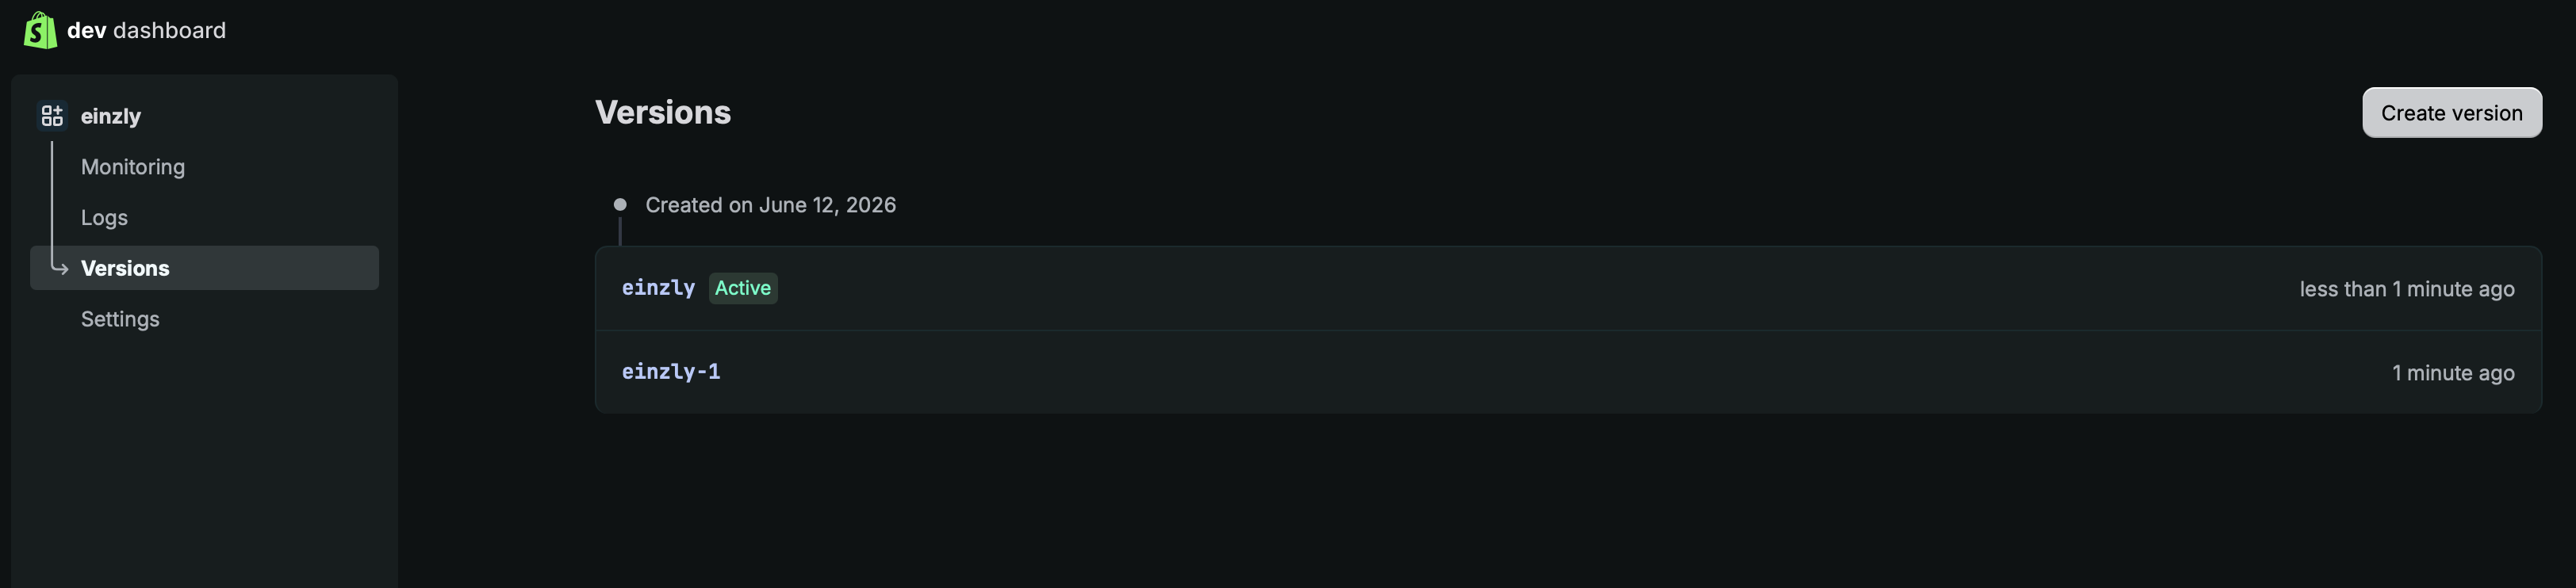
Step 3: Release a version
Create a version and click «Release». Only a released version can be installed. In the «Versions» section it then appears as «Active».
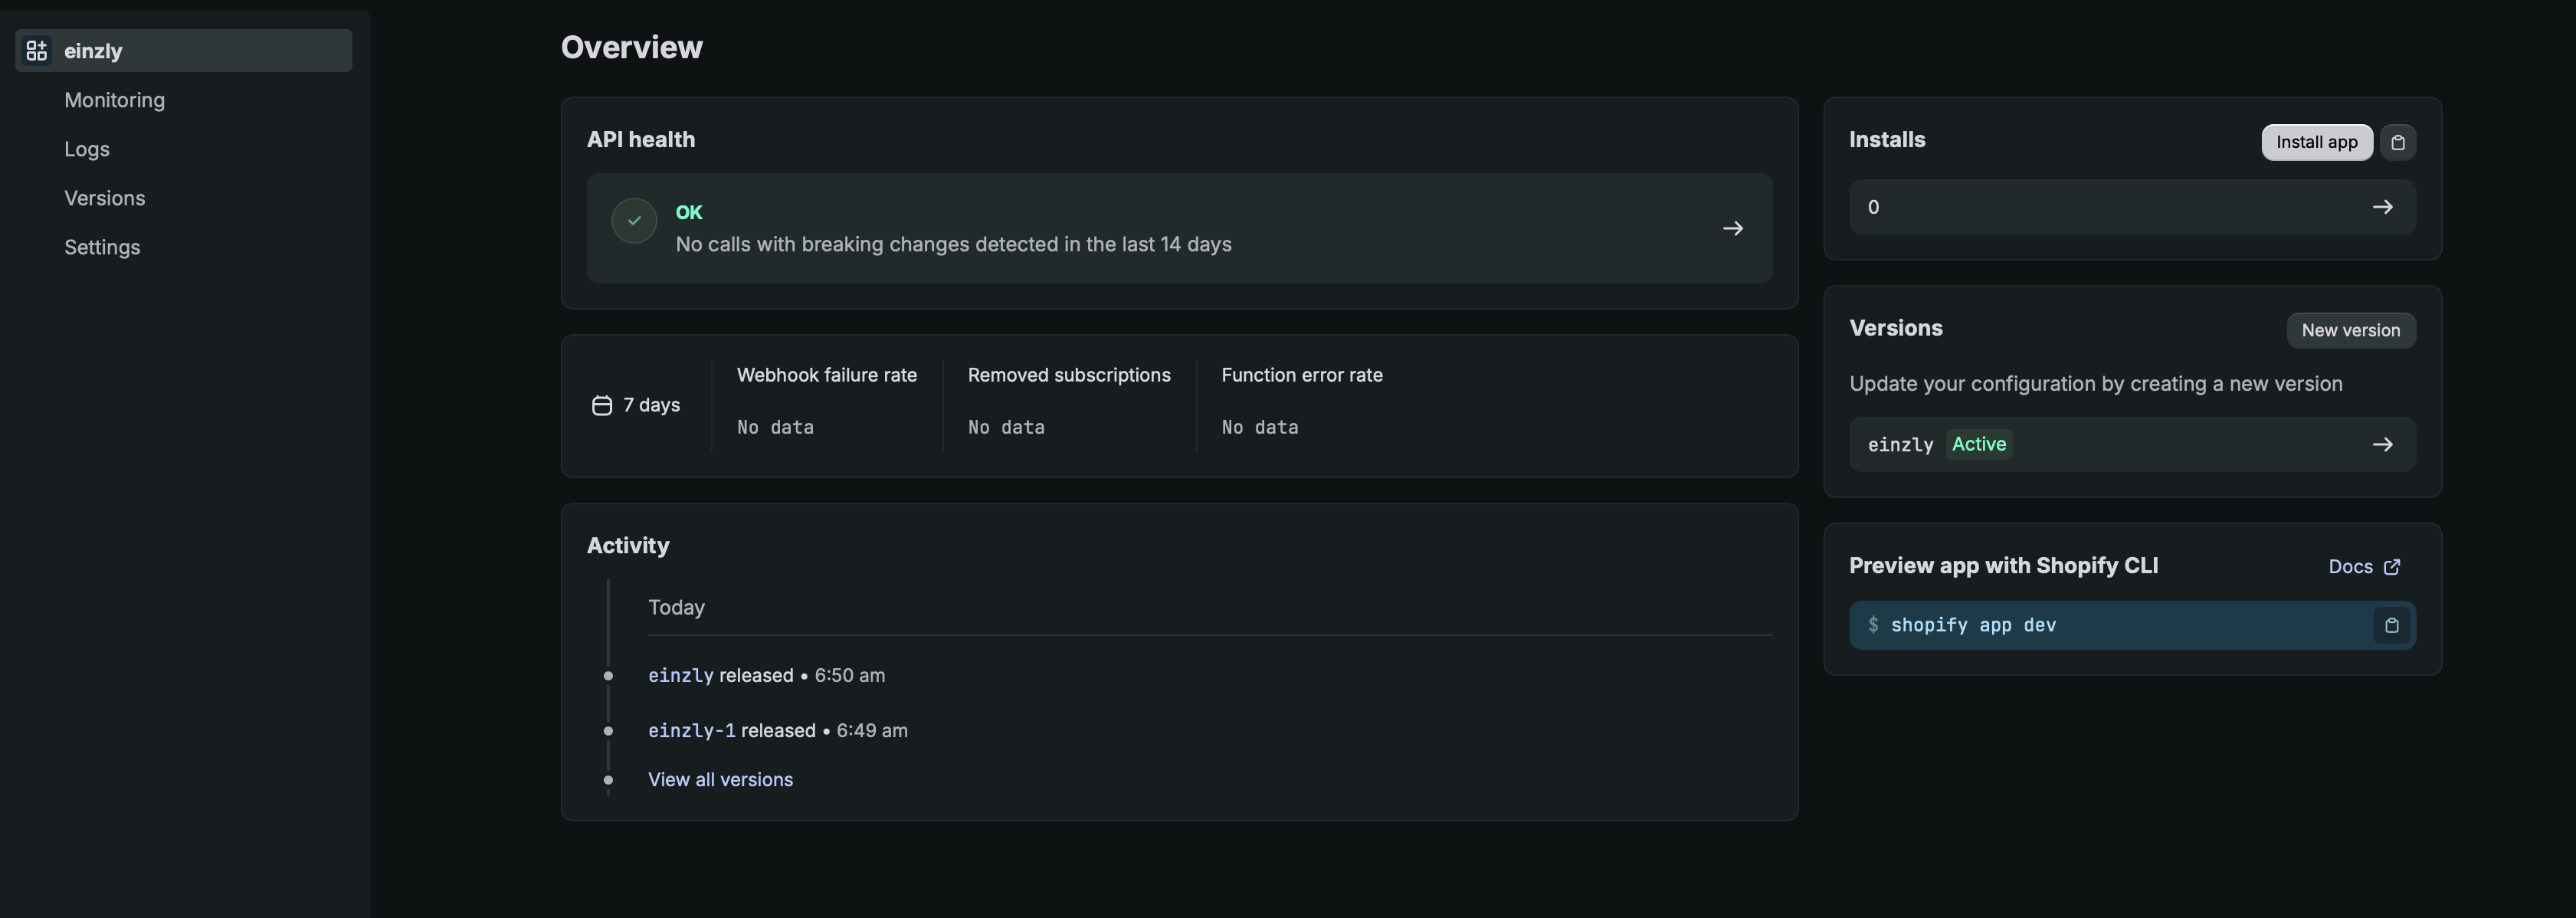
Step 4: Install the app
Click your app name on the left to reach the overview (Home). In the «Installs» box at the top right, click «Install app» and select your store. This step is important: without the app installed, einzly cannot connect.
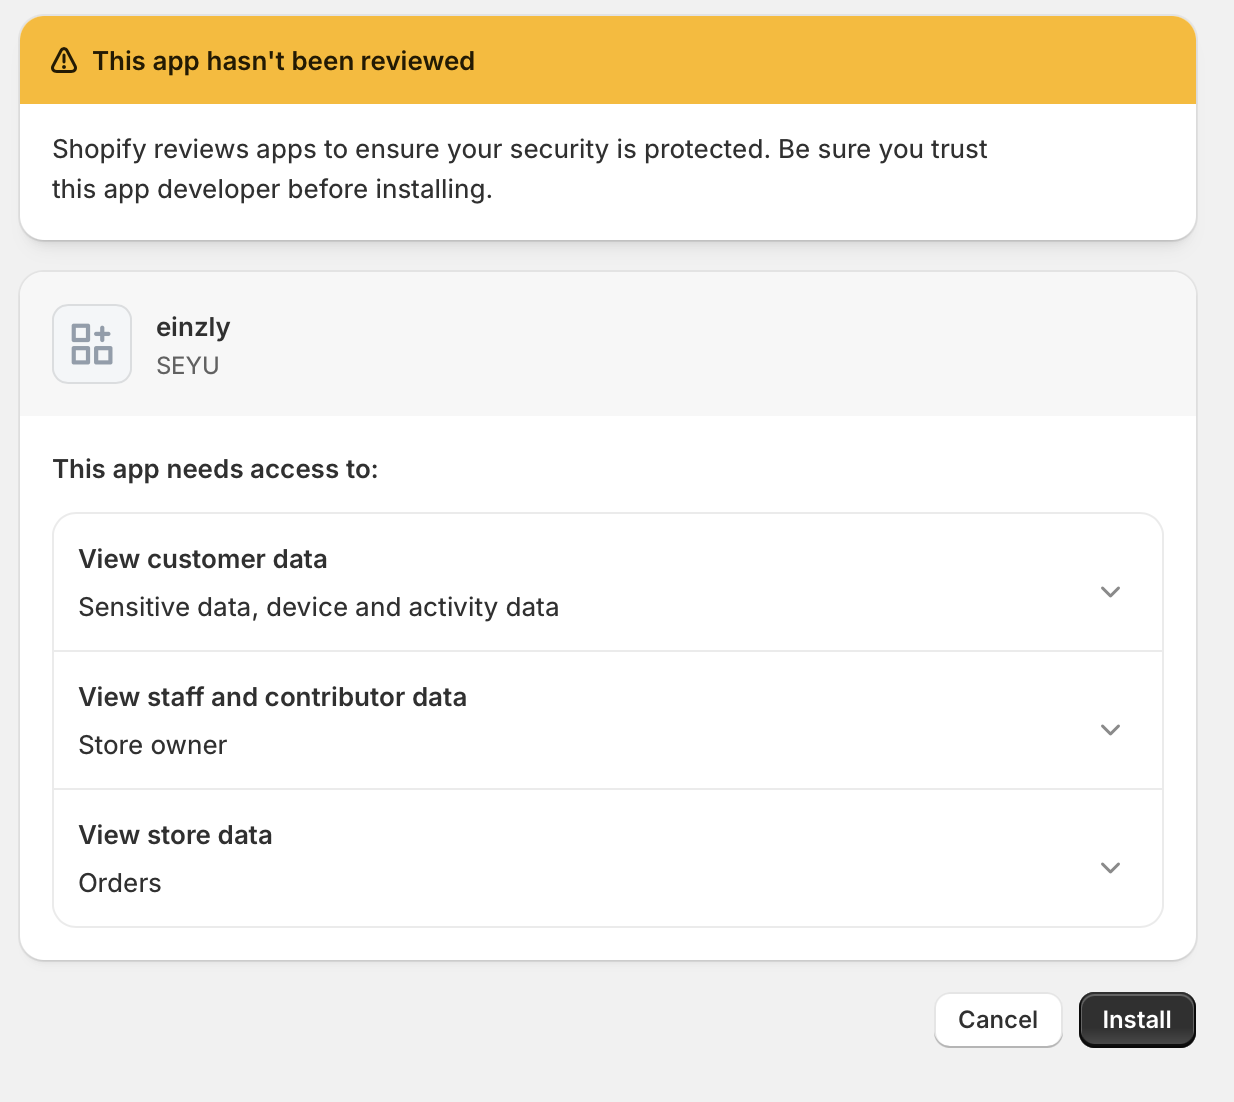
Step 5: Confirm in your store
You'll be redirected to your store admin. Shopify shows you what the app can access — namely your orders («View store data: Orders»). Click «Install» to confirm the installation.
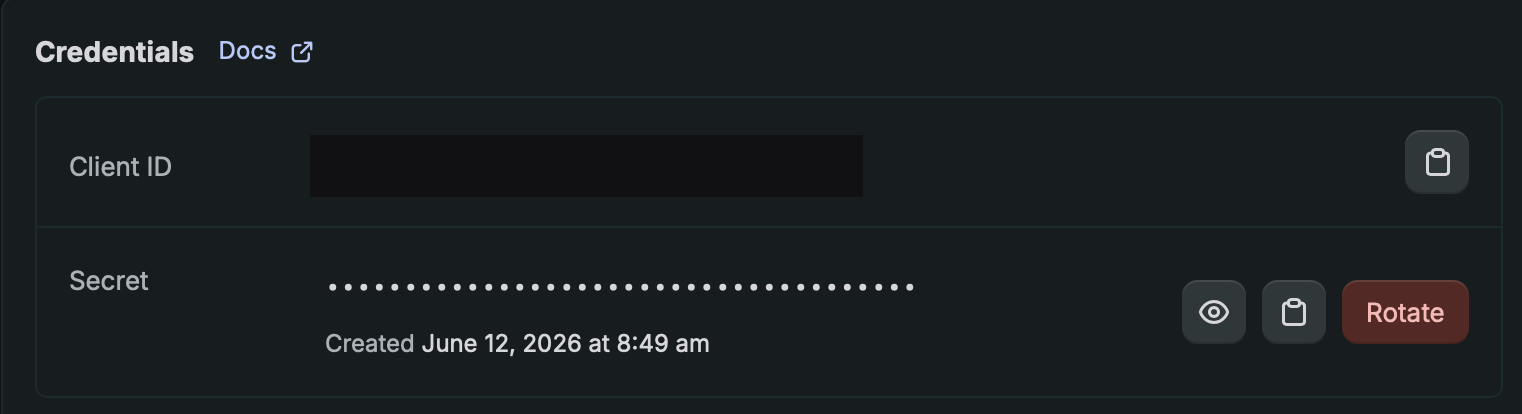
Step 6: Copy Client ID and Secret
Back in the Dev Dashboard, click «Settings» on the left. Under «Credentials» you'll find your Client ID and the Secret. Copy both values.
Step 7: Paste into einzly and connect
In einzly, open Settings → Integrations → Shopify. Paste your shop domain, the Client ID and the Client Secret, optionally choose a start date for the import and click «Connect». einzly verifies the credentials automatically and fetches a fresh access token itself on every sync — you never have to renew anything.
03Where do I find my shop domain?
Your shop domain ends in .myshopify.com (for example mystore.myshopify.com). You'll find it in the Shopify admin under Settings → Domains. Even if your store runs on a custom domain, enter the .myshopify.com address in einzly — that's the technical address of your store.
04What gets booked automatically?
For every paid order, einzly creates an income entry for the gross amount. If you process the payment via Shopify Payments, the transaction fee is automatically added as a separate expense. That way your books clearly separate what you earned from what Shopify charged for it.
A concrete example
A customer orders for CHF 100.00 and pays by card via Shopify Payments. Shopify deducts the transaction fee.
| What | Amount | Category | Receipt |
|---|---|---|---|
| Income: "Shopify order" | CHF 100.00 | Incoming payment | Order in the Shopify admin |
| Expense: "Shopify fee" | CHF 3.20 | Bank charges | Order in the Shopify admin |
Around CHF 96.80 net ends up in your payout. Everything adds up in your books: gross income and fee are cleanly separated — and the total matches exactly your Shopify payout.
And what about a refund?
If you refund money to a customer, einzly books this as negative income (revenue reduction) — not as an expense. That is the correct accounting approach: your reported revenue goes down, and if you're liable for VAT, the VAT automatically reverses correctly. Booking a refund as an expense would artificially inflate your revenue — which is exactly what einzly avoids.
05When does it sync?
- einzly synchronises your Shopify orders automatically every day
- You can also trigger a manual sync in the settings at any time
- When connecting, you can optionally choose a start date to import past orders
- A re-check window of several days ensures that fees and refunds finalised later are still recorded cleanly
- Only paid orders are booked — open or abandoned orders are ignored
06Advantages over manual booking
| Manual | With Shopify integration | |
|---|---|---|
| Record income | Type in every order | Automatic |
| Record fee | Find & book the fee | Automatic |
| Book refund | Book it VAT-correct yourself | Automatic as revenue reduction |
| Attach receipt | Take a screenshot | Linked automatically |
| Avoid duplicates | Watch out yourself | Automatic detection |
| Time per order | ~1–2 minutes | 0 seconds |